


Oil Painting - It's Easier Than You Think!
I feel oil painting is often made more complicated than it needs to be. While it can be complicated to get certain results and effects, it's not necessary to paint this way if you don't want to.
SOLVENTS:
You don't need to use solvents. I wipe my brushes on a piece of kitchen roll between colours, and wash them with washing up liquid at the end of the painting session. Washing up liquid is designed to cut through grease and remove it, and this means it's perfectly suited to cleaning oil paint off brushes. I just rub washing up liquid into the bristles, rinse, repeat, and dry with some kitchen roll.
FUMES:
Avoiding solvents means avoiding fumes! Oil paint does smell, but only in the same way that cooking oil smells. Solvent free painting is better for you, and better for the environment.
MEDIUMS:
I've tried various different mediums, but I have found paint that works the way I want and mediums are no longer needed for me. Some paint brands, like Old Holland and Winton, are thick and stiff. Other paint brands, such as Sennelier and Georgian, are slippery and smooth. It's about doing some research and finding one that suits you. For thinner paint than you can buy in the tube, such as for glazing, a bottle of safflower oil is all you need.
SURFACE:
This has been the most difficult part for me, up until fairly recently. I am very conscious of creating archival work, work that will last. Oil paint can be quite aggressive to surfaces and, if not prepared properly with a sufficient barrier, the oil in the paint will destroy the surface over time. Most canvases you can buy ready primed are not primed well enough to stop the oil sinking through the top coat and destroying the fabric underneath, and you can begin to see the results of this after only a few months.
Unfortunately, I am not good at prep work. The thought of priming, sanding, priming, sanding, and so on makes me want to curl up into a ball on the floor, so I have found a way that means prep is simple, quick, and easy. I paint on Clairefontaine Paint-On paper prepared with PVA glue. You can slap glue on pretty much anything and paint on it. Once every couple of months or so I'll spend an hour spreading a thick layer of glue over a load of sheets of paper and leave them all over the floor to dry. Once dry they get pinned to sound insulation boards and that's my prep work done, I'm ready to paint!

Above: paintings in progress pinned to sound insulation boards on their drying rack.
OIL PAINT IS CHILL:
It won't rush you. Unlike acrylic, if you need to step away in the middle of painting, oil paint will wait patiently for you to come back and carry on. It won't lie there on your palette all dried out laughing at you and saying, "No, it's too late. You'll have to start all over again." Unlike watercolour, if you make a mistake you can wipe it off or let it dry, and paint over it.
For my palette I use a sheet of A4 acetate taped to my desk. After each painting session, all of the mixed colours are scraped up with a painting knife and mixed into a beautiful neutral (seen at the right of the photo below) which is then used somewhere in the next painting. Then any oil paint left behind is wiped up with tissue and we're ready to go next time.
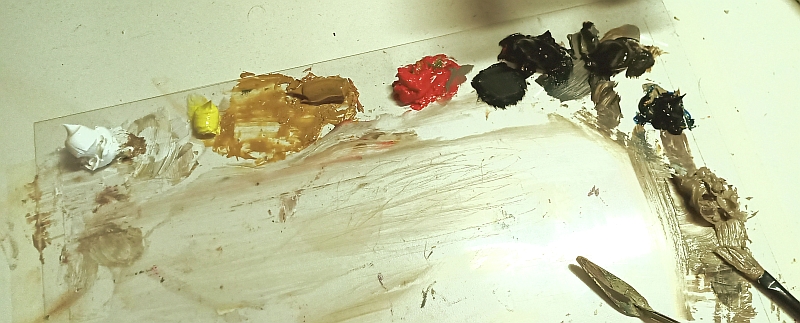
Above: my palette.
HAVEN'T TRIED IT? GO FOR IT!
So if you haven't tried oil painting before and fancy it, give it a go with a few tubes of paint and some brushes, some stiff paper, and some PVA glue! It's awesome; the way oil paint handles from brush to surface is a tactile experience which is second to none, it's really forgiving, accessible, and quite easy, and you don't need to break the bank to start out!
I've posted a discussion about artists' and student paint quality here: Artists' Quality VS Student Quality and advice about choosing the colours for your palette here: Choosing Your Palette

